How to read MDN documentation
We will start with a very important skill that you must have as a programmer. You may have heard the saying, RTFM, which stands for "Read the f******** manual". This is common in software engineering because most problems can be solved by reading documentation. And when I say "documentation", I'm just referring to the instructional guides written to explain how to use a certain framework, library, or programming language.
Since we have only been exposed to JavaScript thus far, the most common source of documentation is MDN (Mozilla Developer Network). Here is the homepage for JavaScript documentation.
The documentation for each language/framework/library will be different, but high-quality documentation usually has the following resources available to the developer.
- A Quick Start or Overview guide
- An extended tutorial
- API Reference (often just called "Reference" or "API")
Whenever I start learning a new framework, the Quick Start and tutorial(s) is a great way to learn the basics and then I lean on the API reference (along with unofficial tutorials) as needed while building my project.
Here is the API Reference for the JavaScript programming language. Since JavaScript is so widespread, there are several websites that provide an API reference, but usually, frameworks and libraries will only have one "official" set of documentation.
As you scroll through JavaScript's reference, you may be confused, and that's okay. Remember, the reference documents everything about JavaScript. You don't need to read it like a book. Use it as a reference (hence the name).
Let's say that you were solving one of the practice problems from the last lesson and you wanted to know more about the push() method that we use on arrays. Here's how you get there.
- Go to the JavaScript reference
- Since
push()is an array method, find the Array data type and click on it. - Scroll down to "Instance methods" and click the push method.
- Read the page that explains how this method works
Step #4 is much easier said than done. Reading documentation is hard for beginners, so let's walk through how to do it.
Overview Section
Let's look at an Array method called pop(). It is one of the easiest methods to learn. Here is the documentation that the screenshots are from.

The documentation usually starts off with an overview of the function. This oftentimes is the only information that you'll need. From this overview, we can see that the pop() method removes the last element of an array (i.e. modifies the original array) and returns the element that was removed.
But maybe the overview section doesn't give you all the information you need. Scroll down to the syntax section.
Syntax
This section is probably the most direct way of documenting a function. This explains to you the inputs and outputs that the functions receives and returns respectively. Once you get good at reading documentation and have a familiarity with programming in general, this section is usually all that you will need to start using a given function.
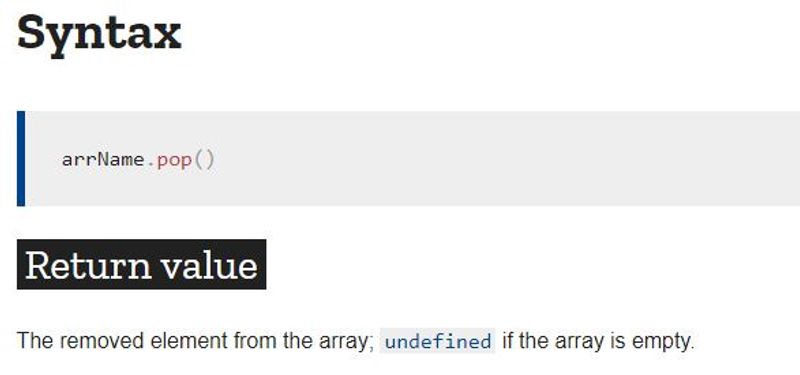
Let's continue with the array.pop() method.

By looking at this, we can infer that the pop() method does not take any parameters and returns the value of the array that was removed.
Unlike the overview section, this also notes that if you use the pop method on an empty array, it will return undefined. You can go ahead and try this out in your dev tools console.
const emptyArr = [];

const result = emptyArr.pop();

console.log(result); // undefined
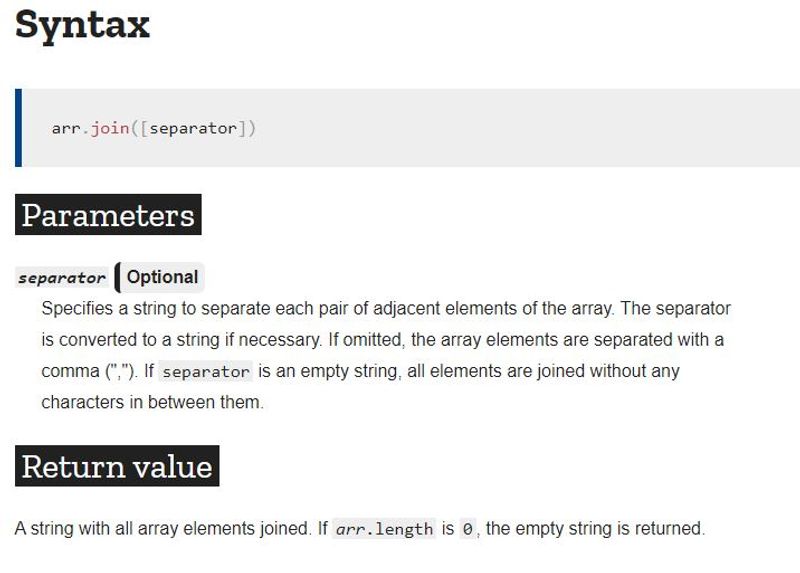
Let's look at another method that is a bit more complex. Here is the array.join() method's "Syntax" section (link to page).

Unlike the array.pop() method, this one has a single, optional parameter. We can tell that the parameter is optional because [separator] has [] surrounding it. Additionally, in the parameters section, it denotes that this is optional.
Looking at the return value, you can see that this method returns a String value with all the elements of the given array joined together. It also notes that if you try to use this method on an empty array, the return value will be an empty string.
Here's how you would translate this documentation into code.
// First, let's test it without any parameter (since params are optional)
let arr = ["hello", "world"];

arr.join(); // "hello,world"

// Now, let's add a parameter in there
arr.join(" "); // "hello world"

// And finally, let's try it on an empty array which according to
// the documentation, should return an empty string
let empty = [];

empty.join(); // ""
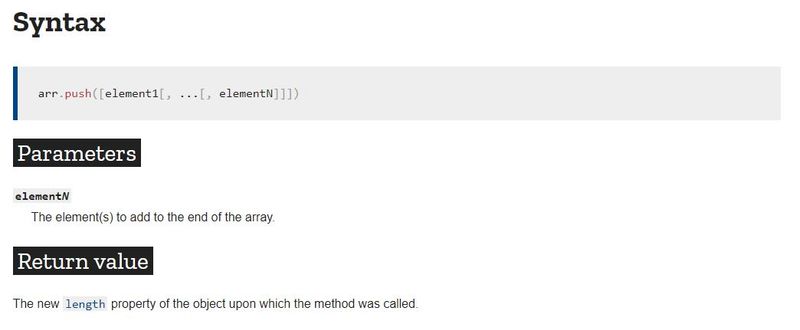
Here's the syntax section of the push() method.

Let's start with this part:
arr.push([element1[, ...[, elementN]]])
What on earth is going on here?! What this is trying to explain is the function's parameters. First, the brackets [] indicate that arguments are optional (not to be confused with the array bracket syntax we learned earlier). In this case, if you don't pass an argument, your array will remain unchanged. Second, you'll notice the ... which tell us that this method takes an infinite number of arguments.
As we look at the return value, we can see that it returns the length of the new array after the push operation. Take a look at the code below and guess what the result variable equals.
const arr = [1, 2, 3, 4, 5];

const result = arr.push(6, 7, 8, 9);

console.log(result);
console.log(arr);
No, result does not equal [1, 2, 3, 4, 5, 6, 7, 8, 9] as you might expect. The result variable equals 9 (the length of the new array) and arr equals the new array.
You might ask–well we assigned this with the const keyword, so how can we re-assign it?! I don't want to get too far off topic, so go read this if you're curious.
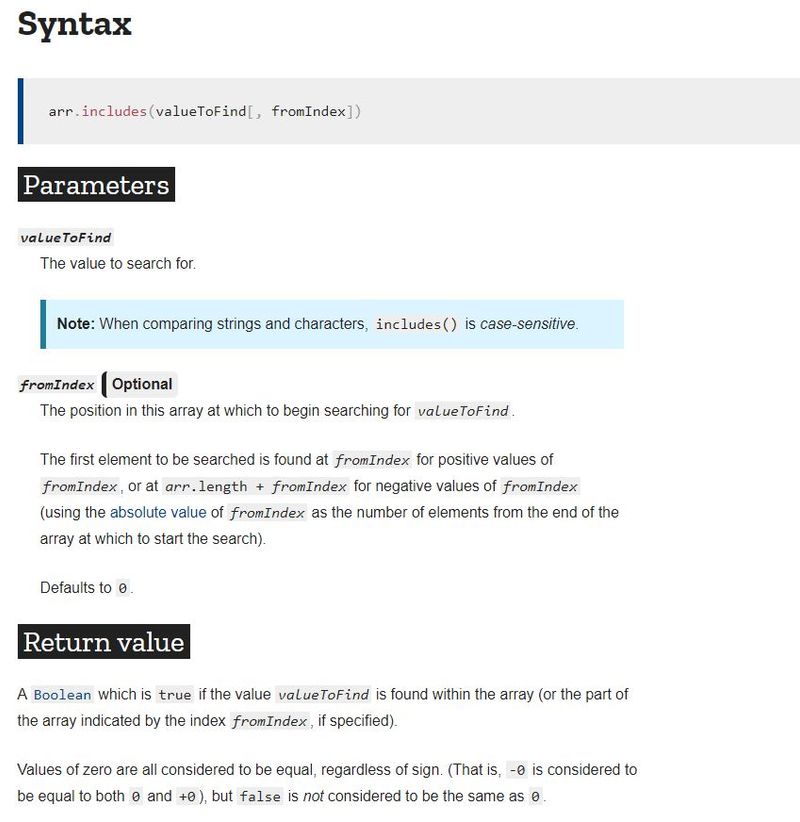
Okay, let's look at one more example.

First, you'll see that this function has two parameters. The valueToFind parameter is required while the fromIndex is optional (you'll notice at the bottom of its description, it says that it defaults to 0).
The return value is a boolean, which indicates whether valueToFind exists in the arr that we are searching in.
Using just this information above, we can try out a few different ways of using this method.
const myArray = ["orange", "blue", "green", "red"];

myArray.includes("orange", 1); // false, since we start searching at index 1 and orange is index 0
myArray.includes("orange"); // true
myArray.includes(); // false, need a parameter
Examples, Specifications, Browser Compatibility
The remaining sections you will see in the documentation for a specific method like the ones above are useful, but not always required.
The examples section is self-explanatory. The specifications section will show you where in the ECMAScript standards you will find this method (remember from lesson 2?).
And finally, the browser compatibility will show you which browsers this function will work correctly in. If you look at the arr.includes() method, it won't work in Internet Explorer, so if you are building an application that needs to work in IE (say in a large corporation), you should NOT use the arr.includes() method. Starting out, I wouldn't focus on browser compatibility though–learning to code is hard enough!
